In this article you will learn how to add an option based component to an Opex position. As an option based component we understand an Opex position with bonus and/or malus components or an opex position with floors and/or caps.
The option based component will be explained based on bonus components. The procedure differs only minimally from an opex position with floors and caps.
As an example we will take a look at full maintenance costs with an option based component:
Base fee: EUR 42’000 (year 1-2), EUR 60’000 (year 3), EUR 68’200 (year 4-20)
Performance-related fee: 0.006 € / kWh from a yearly production of 5 Mio. kWh
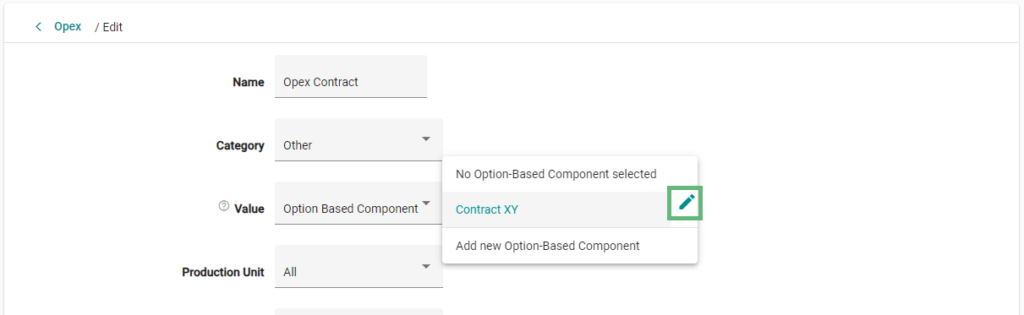
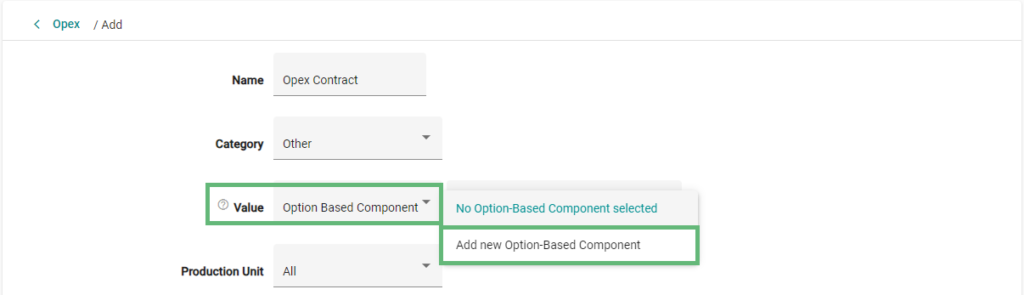
- To add an option based component to an Opex position, click on the appropriate object or add a new object in the “Opex” section.
- Choose “Option Based Component” in the dropdown menu “Value”. Additionally you have to click “Add new Option-Based Component” next to the Input field.
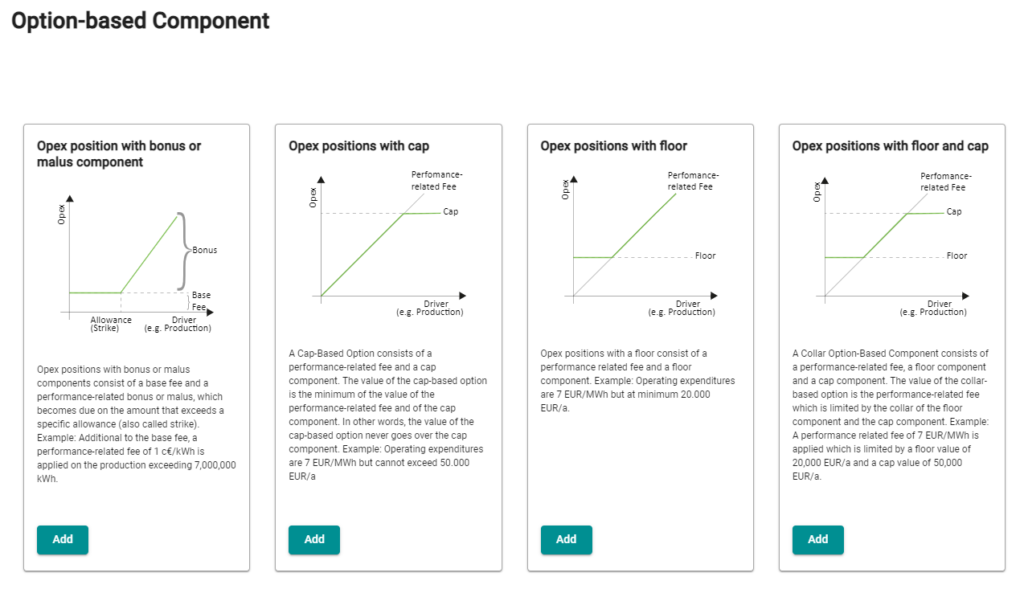
You have the option to select between 4 different option components.
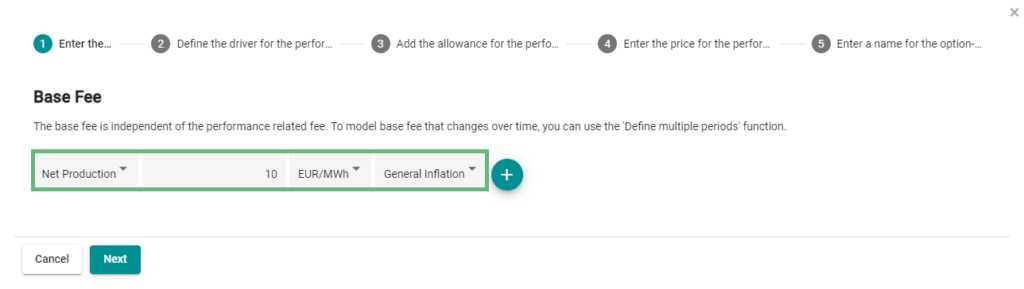
- A new window opens in which you are guided through the option based component recording (in this example with bonus or malus component). In the top left corner, you can see which step you are in at any time. In 5 steps you have modeled the bonus component.
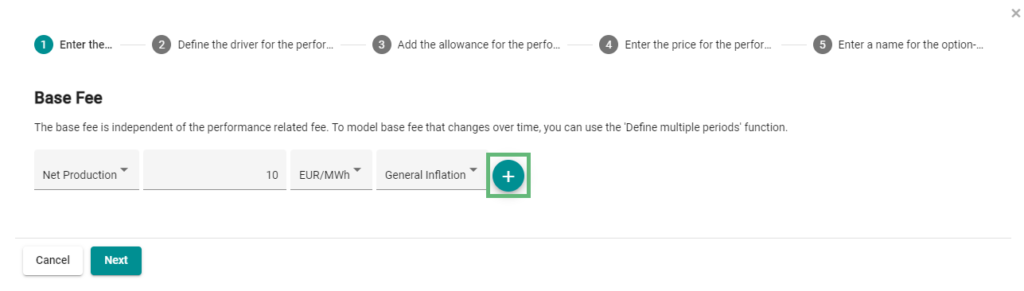
- As the first step you enter the base fee. If it is a constant base fee that does not change over time, you can enter it in the labeled field. You have the option to select the driver for the unit and to add an indexation to the base fee.
- If the base fee changes over time (as in our example), you have to click on “+” to enter different base fees.
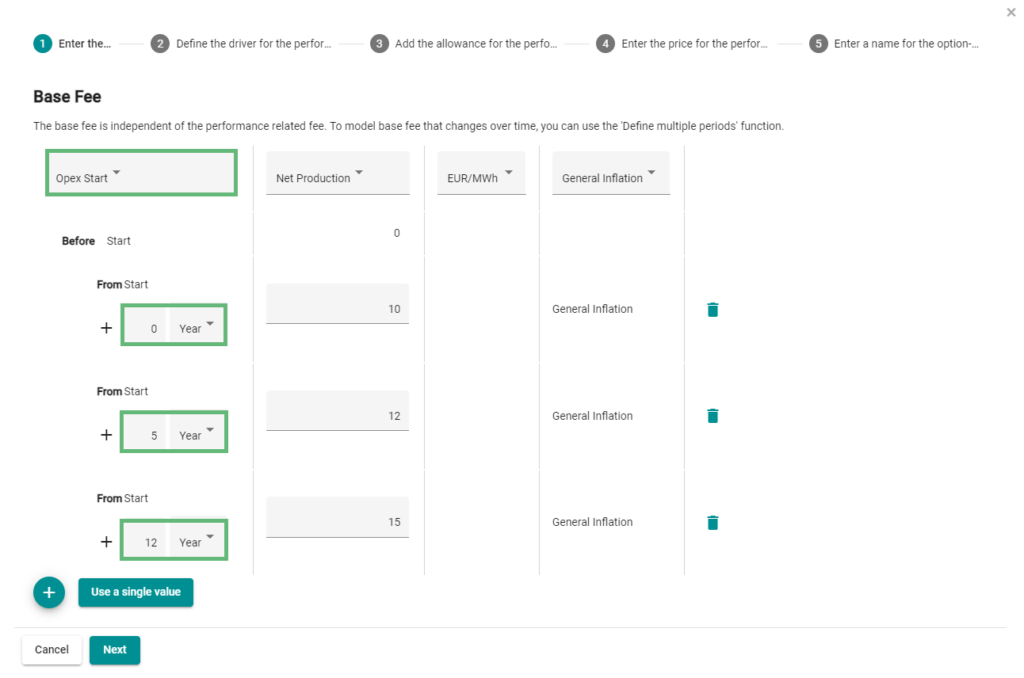
Our example includes 3 different base fees over the lifetime
- Click on “Opex Start” to select the date reference for the time intervals. You can choose between relative and absolute data (More about relative and absolute dates: How to work with relative date relations).
In our example, in order to set the base fee in year 6, we choose “Opex start” + 5 years, for years 13- end of project we choose “Opex start” + 12 years. Note that the last entry is valid until the end of the operating cost object.
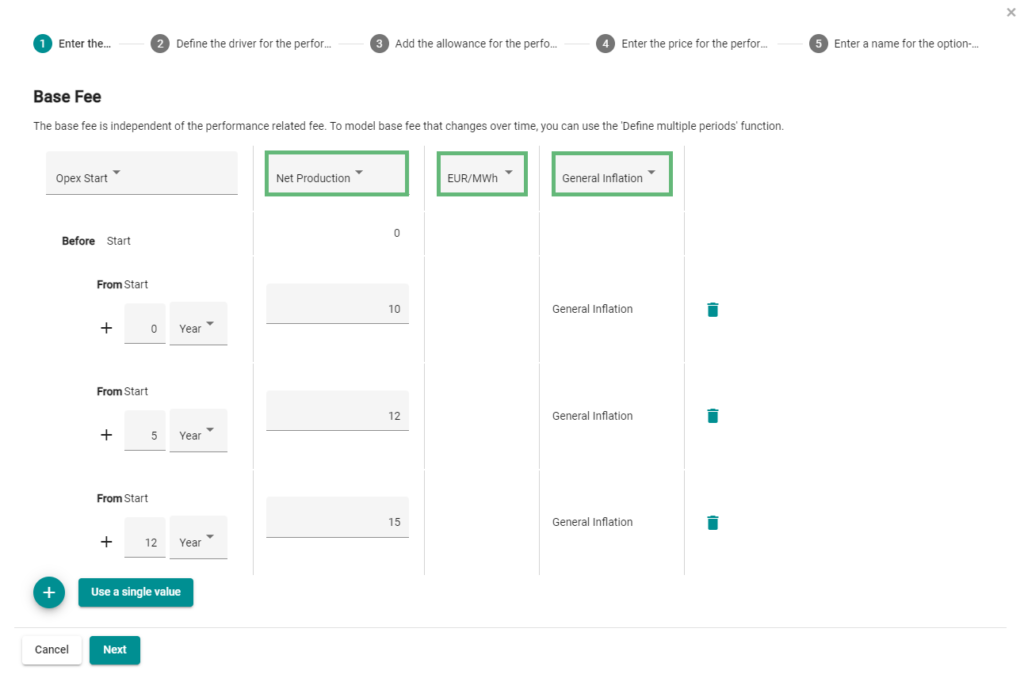
- Even if you have selected more than one time interval, you can choose the driver for the base fee and enter an inflation. To do this, click on the respective headings in the table.
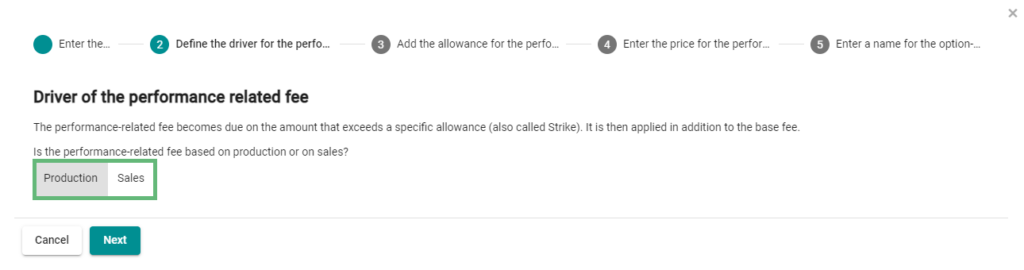
- In the second step, you enter the driver for the performance-related fee. The performance-related fee becomes due on the amount that exceeds a specific allowance (also called Strike). It is then applied in addition to the base fee. Here you have the option of specifying whether the performance-related fee depends on the production or on the sales. Confirm the entry with “Next”.
- In step 3 you can define the allowance. From this allowance limit, the performance-related fee applies. Again, you can choose the unit as well as the inflation. You can also define an allowance that changes over time by clicking on “+”. The procedure is the same as for the base fee.
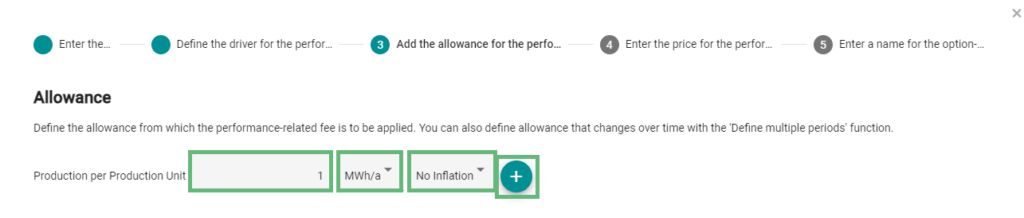
- In addition, you can choose the period that applies to the allowance. For example, for the calendar year, January should be selected.

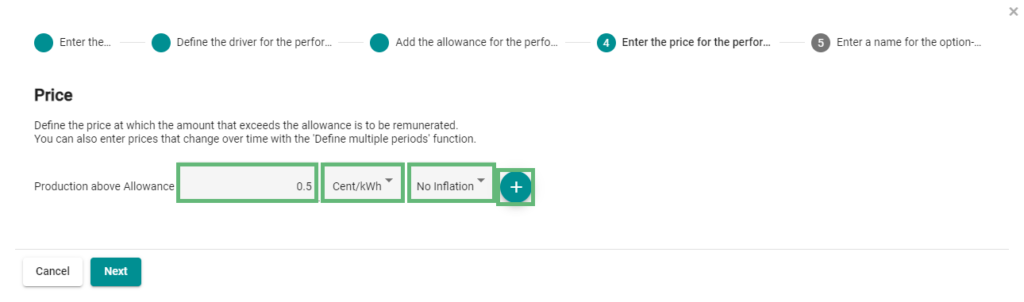
- In the next step, you can define the price at which the amount that exceeds the allowance is to be remunerated. Similar to the procedure for the base fee, you can define several time intervals here, should the price vary over time.
- In the last step, enter a name for the option-based component and save it. After that you have to save the entire opex object.

- The created option-based component can be viewed at any time in the detail view of the project and edited directly. Click on the created object next to the “Value” input (here “Bonus-Malus”). You can also view and edit all option-based components in the “Bonus-Malus” area within the “Template” section.