In this article you will learn:
- how to add a new project version
- to define the default version (and what “default version” means)
- If you like to add a new version to an already existing project, go in the appropriate project detail to the “Master” section.
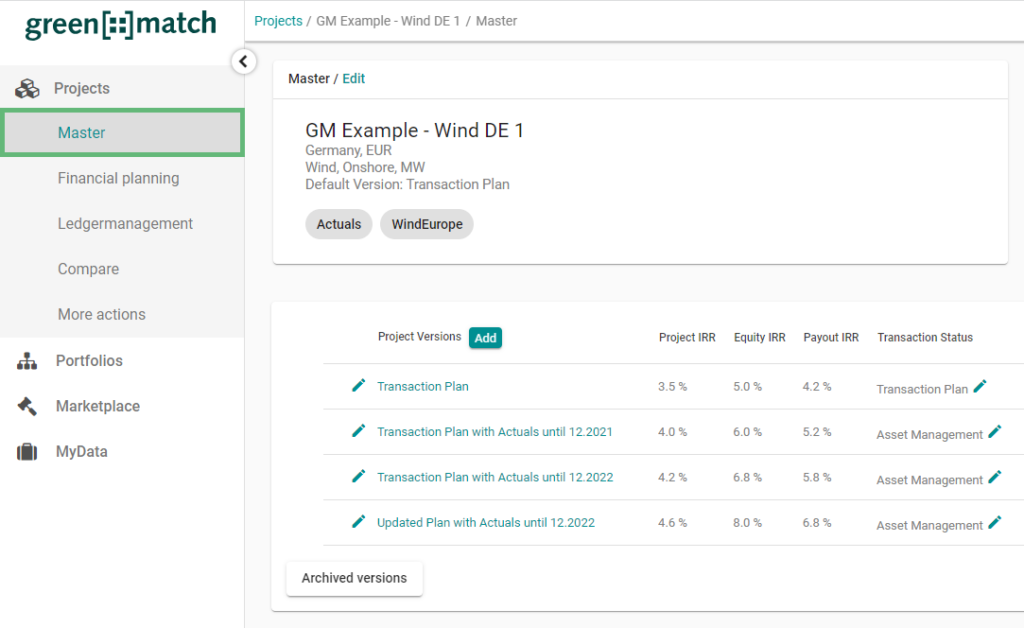
- In the area “Project Versions” you can manage, delete (click on the name) or add new versions. To create a new version, click on “add”.
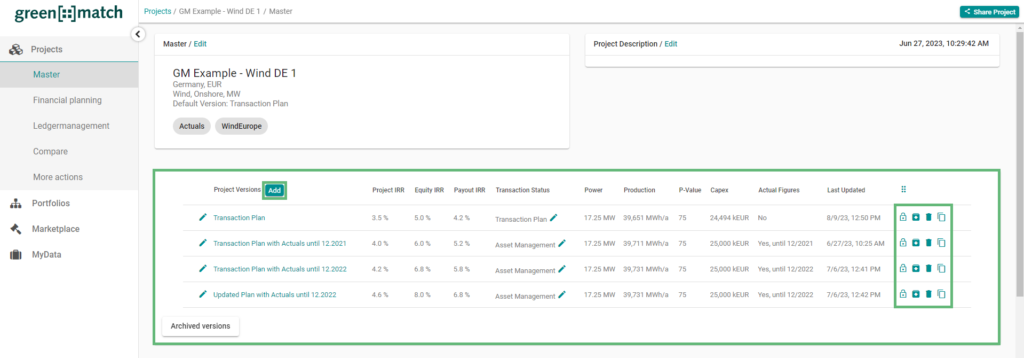
- If you have already added several versions, in the input field “Templates” you can select which one is to serve as the basis for the new one. If you have not created an additional version yet, the “First version” is already the default one. Then give it a name and click on “Create”. Once created, you are directly in the new version.

Note: The currently selected version can be seen in the project navigation. You can change the version by using the dropdown.
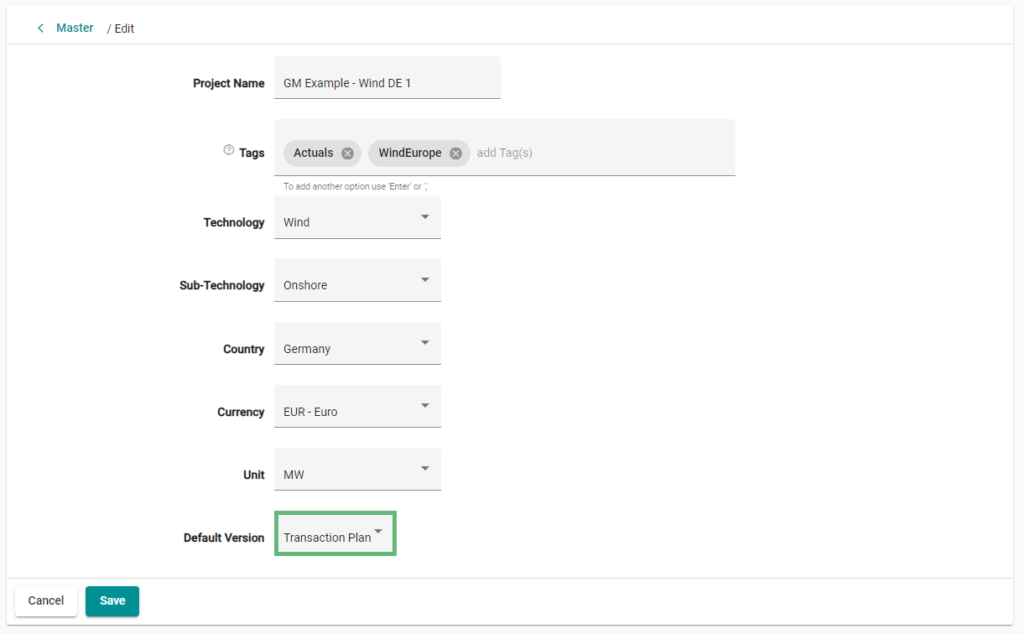
Setting the default version
The default version defines which version is used for the display of key figures in overviews:
- The key figures (returns, purchase price, etc.) from the standard version are shown in the project list.
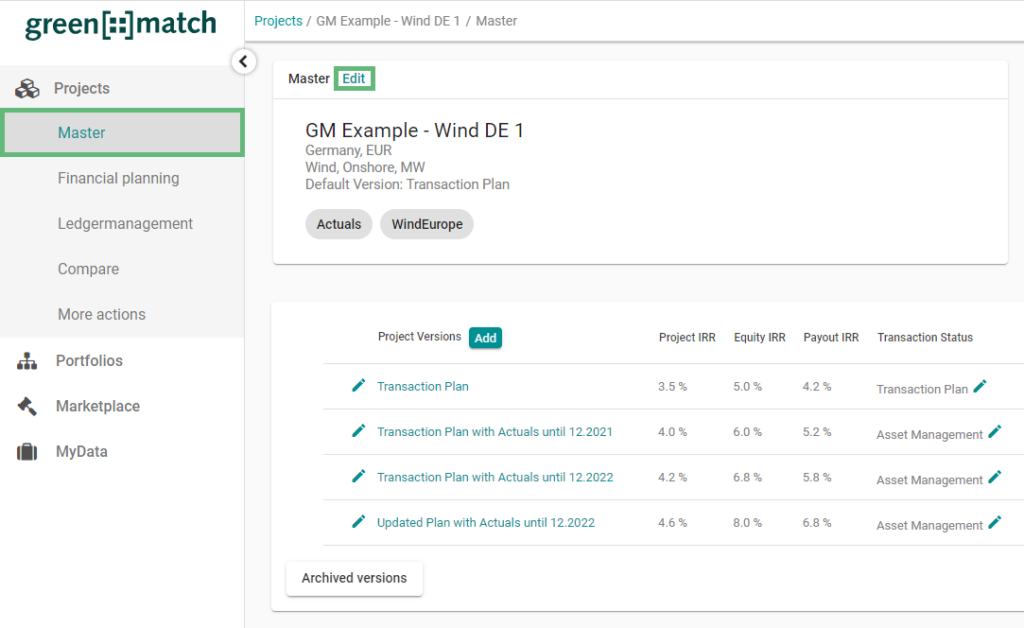
- When the project is shared on the marketplace, the key figures from the standard version appear in the project teaser. If you like to change the default version of a project, go to the “Master” section.
- Click in the input field “Master” on “Edit”. Note: The actual default version in the example is the “Transaction Plan”.
- In the input field “Default Version” you can define the desired version and confirm by clicking “Save”.